HELLO AGAIN fellow shopaholics as well as beauty addicts! Hopefully my increased blog posting frequency is able to make up for the lack of updates during my school term. It’s quite sad to know that I’ve only published 49 posts despite being on WordPress for more than 3 years already.
Anyway that’s beside the point! I’ve been really eager to share what I have bought on Carousell ever since penning my review on that awesome app. I have spent way too much that Boyfriend has to monitor my Carousell usage lol. I seldom buy from Sephora now because you can snatch up brand new (or barely used) products at more than half the retail price. So far I’ve been really lucky to see stuff I wanted to buy from Sephora appearing on Carousell. You’re also able to haggle the price down if the seller allows so can you imagine how much money I’ve saved by Carousell shopping instead?
As it is another form of online shopping, there are risks involved in buying cosmetics through Carousell such as receiving counterfeits (even though seller claims otherwise), expired products and the uncertainty of the actual product condition because you’re unable to touch nor see it before purchasing. Real-life pictures can also be deceiving at times. I once bought a MAC foundation and was planning to use it after I was done with my Benefit Hello Flawless!. I’ve heard good reviews about the MAC foundation and was thrilled to find someone selling a barely used/brand new one for $15. I met the seller, inspected the bottle and found nothing amiss about it. As it was bought as a backup, I didn’t try/swatch it until one day when I decided to use it. When I saw it again, I was shocked to see a layer of translucent liquid lying on top of the foundation. It seemed like water. I shook the bottle and pumped once on my hand. I could feel that the foundation was so runny/diluted that it could hardly stay on my hand. I deduce that the seller added water to it and passed it off as new to me but I couldn’t do anything about it since I had only realised this after several weeks.
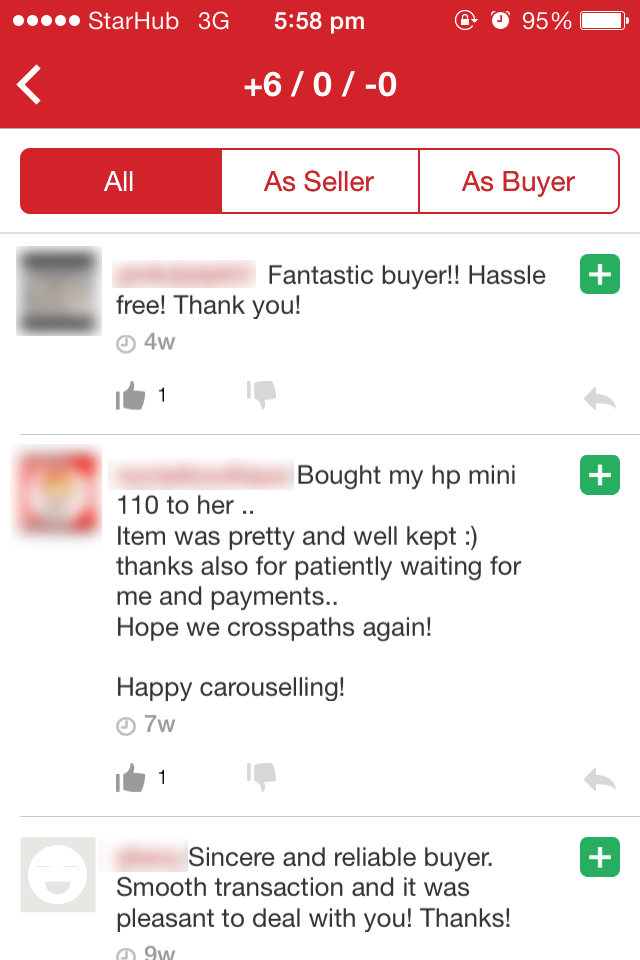
Other than that, my Carousell experience has been nothing short of awesome and all the setbacks obviously didn’t deter me from buying more (I’m like a make-up collector now LOL). If you ask me, I think Carousell is much safer than eBay.
Here are some of my hauls that I felt were worth every penny I paid or otherwise, worth mentioning. These are all authentic ones (I have been to Sephora so many times that I think I’m already an expert in identifying fakes now) at very reasonable prices! All prices are in Singapore dollars unless otherwise stated.

Shu Uemura x Karl Lagerfeld Eyelash Curler (S$10) – RP US$24
I’ve heard great things about Shu Uemura’s eyelash curlers so for the longest time, I was hunting it down on Carousell. I was so elated to see someone selling a brand new piece with refillable pads for $15 which I then bargained the price down to $10 because the seller wasn’t sure if it was authentic (it was a gift from her friend). I doubt there would be fakes for this though but I still took a gamble and bought it. Thereafter I took this to Shu Uemura JEM outlet for an authenticity check and true enough, this is genuine. Teehee!! This is the Karl Lagerfeld special edition version which works just like the original one. It’s really gooooood. It doesn’t pinch my eyelids like my old one because it’s designed for Asian eyes! The next eyelash curler I’d love to lay my hands on is the Anna Sui one which was used one me during an Anna Sui makeover a few months back (will blog about it soon) and I was very satisfied with the result. Oh and I’ve also the (gold) Shiseido one which works great too!

Benefit World Famous Neutrals (S$15) – RP S$48 / MAC Fluidline Eyeliner Gel (S$5) – RP US$16
2 of the earlier eye make-up I got from the app which I absolutely adore. You cannot deny that the Benefit WFN was a steal! Its original price on Carousell was $18 and the seller even agreed to lower the price to $15 upon my request. Honestly even if she didn’t allow further discounts, I’d still get it anyway! Furthermore, it was brand new and authentic! *gasp*
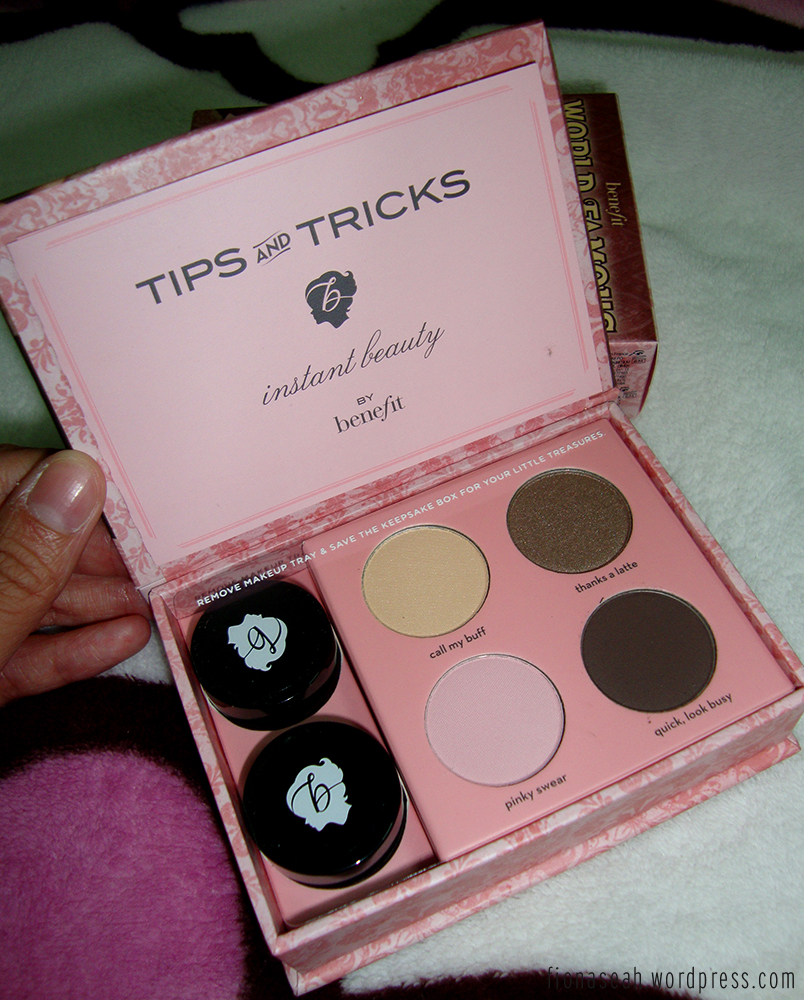
Benefit World Famous Neutrals shades
Totally untouched as you can see. The seller was so nice to even allow reservation for close to a month as I was unable to take time off my busy schedule to meet her. Sellers like her also keep me going back to the app 🙂
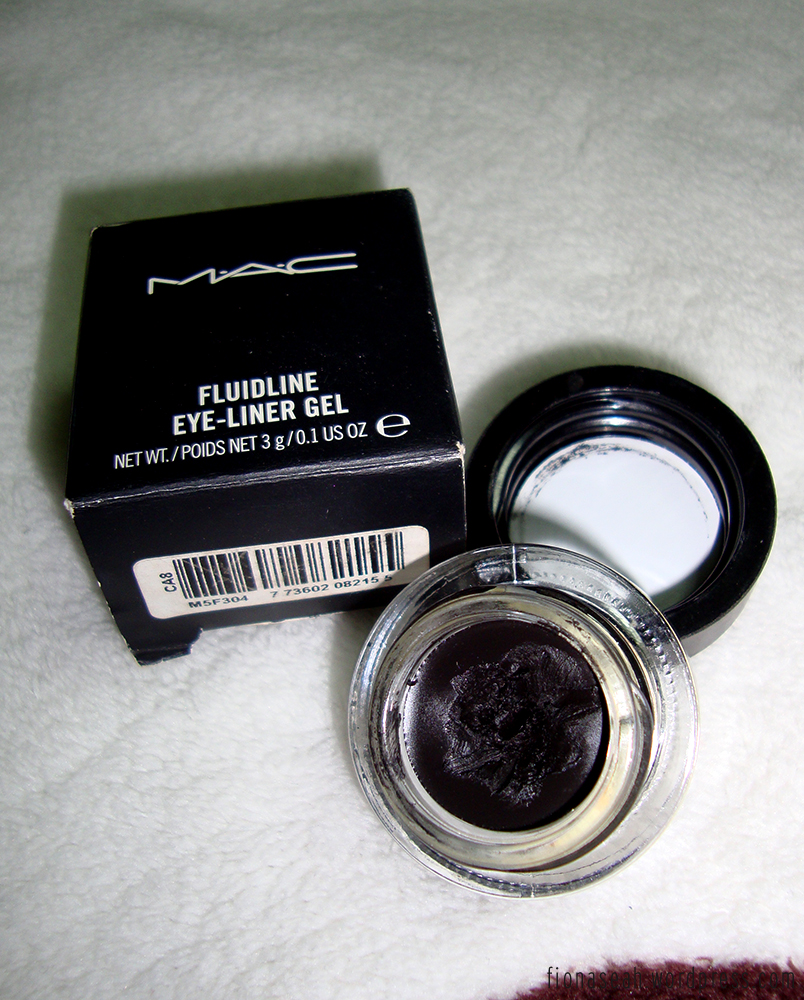
MAC Fluidline Eyeliner Gel
The eyeliner gel was already used (about 90% left) when I got it but I didn’t mind for its low price. I had been using retractable eyeliner but I didn’t really like it as it lacks flexibility (if you get what I mean) so I bought this to try. I’m loving it so far because it has the moistness I’m looking for. I’ve also tried Bobbi Brown’s which in my opinion is slightly better than the MAC one (see below).
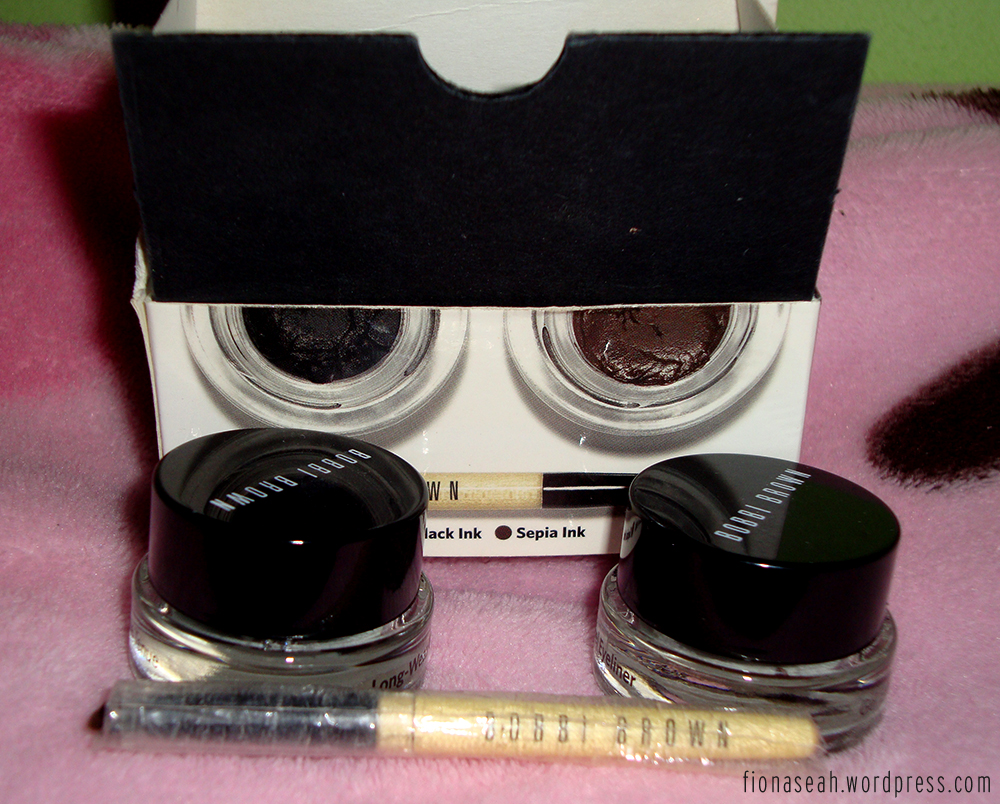
Bobbi Brown Long-Wear Gel Eyeliner Set (S$30) – RP S$80+/US$59
This set comes with an applicator and 2 eyeliner shades – Sepia and Black. I use black for cat eye make-up and sepia for a more neutral look for school and work. I’ve never used the applicator though since I own an angled eyeliner brush but I trust it’s equally awesome too LOL.

Urban Decay Cannonball Mascara (S$22) – RP S$35

Close up of the wand
The best mascara I’ve used so far (I also have MAC Archie’s Girls Mascara which I got from the physical store) because it holds my lashes really well. It also adds enough volume to my lashes and this is very important to someone who doesn’t wear falsies at all lol. However one thing I don’t like about it is the massive fibre fallout after application which I read somewhere is due to it being waterproof (don’t ask me why). I also apply this on my lower lashes. Now, imagine my va-va voom eyes lolol.

Full-sized Urban Decay Eyeshadow Primer Potion (S$8?!?!) – RP S$35+
ZOMG it’s only $8 and yes, I reiterate, it’s authentic AND brand new. It was also the fastest transaction ever: paid and received the product within 10 minutes after enquiring because seller lived in Dhoby Ghaut area and I was just nice at Dhoby Ghaut MRT station when I saw her listing HAHA. I haven’t tried it yet because I’m still using my Too Faced Eyeshadow Insurance. Just mentioning this product because of its unbelievable price!

Wet n Wild Color Icon Brow and Eyeliner pencil (S$3) – RP US$2 / Urban Decay 24/7 Glide-On Eyeliner in Rockstar (S$10) – RP S$30 / Too Faced Shadow Insurance (S$9) – RP US$20
I find the Wet n Wild pencil too harsh as an eyeliner but alright for brows so I use it mainly to darken my brows (also because it feels scratchy when applied on my lids). Considering its price, it does its job fairly well.
The UD pencil is one of my favourites because of the nice colour (kinda like a mixture of purple and brown, perhaps deep purple?). It’s actually my very first UD 24/7 pencil and I am very satisfied with how buttery it is (makes application super easy but also smudges like crazy as a result) and how well it glides (thus its name) on my lids. However it doesn’t really work with my Too Faced shadow primer because it still smudges after awhile onto my lower lids so I will probably try using it with my UDPP next time. I use this occasionally as an eyeshadow by smudging it around my lids with an eyeshadow brush.

Urban Decay 24/7 Glide-On Pencil in Rockstar
I bought the Too Faced primer because I’ve read good reviews about it and my eye make-up tend to move around a lot on my oily lids. As its name suggests, it only works well with eyeshadow but not really with eyeliners. Still, I love it because it enhances the colours of my shadows and I’m still using the same tube after 10 months! The quantity is like never ending because all you need is a tiny amount every time.

Benefit Erase Paste (S$18) – RP SG$42
Yup, it’s brand new 😛

Benefit Erase Paste
I bought this concealer to “erase” my dark circles resulting from late nights. It also gives a brightening effect which helps to revive my dead eyes. I use this minimally though because I feel that without eye bags, my eyes appear smaller LOL. I only use this for the area around my eyes because it doesn’t get trapped in the fine lines below my lower lids.
It comes with a spatula but I don’t know how to use it so I apply with brush. On lazy days I use fingers. For your information, I’m using the medium shade (slightly lighter than my skin tone)

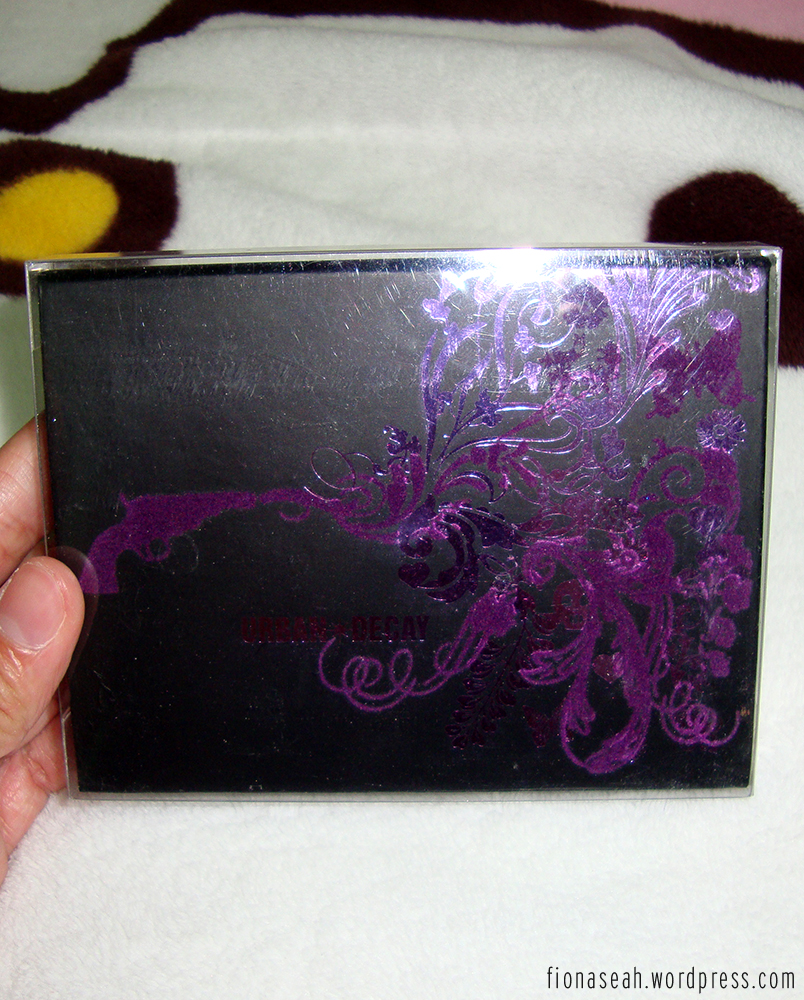
Urban Decay Book of Shadows IV (S$45) – RP S$95
Placed the UDPP there to compare the size. It’s really big (bigger than a usual palette la) because of the barang barang inside:

It has 16 shades of eyeshadow, a mini UDPP, eyeliner in Perversion, mini speaker and some pop-up butterflies near the mirror.
$45 for everything in there? Shut up and take my money!
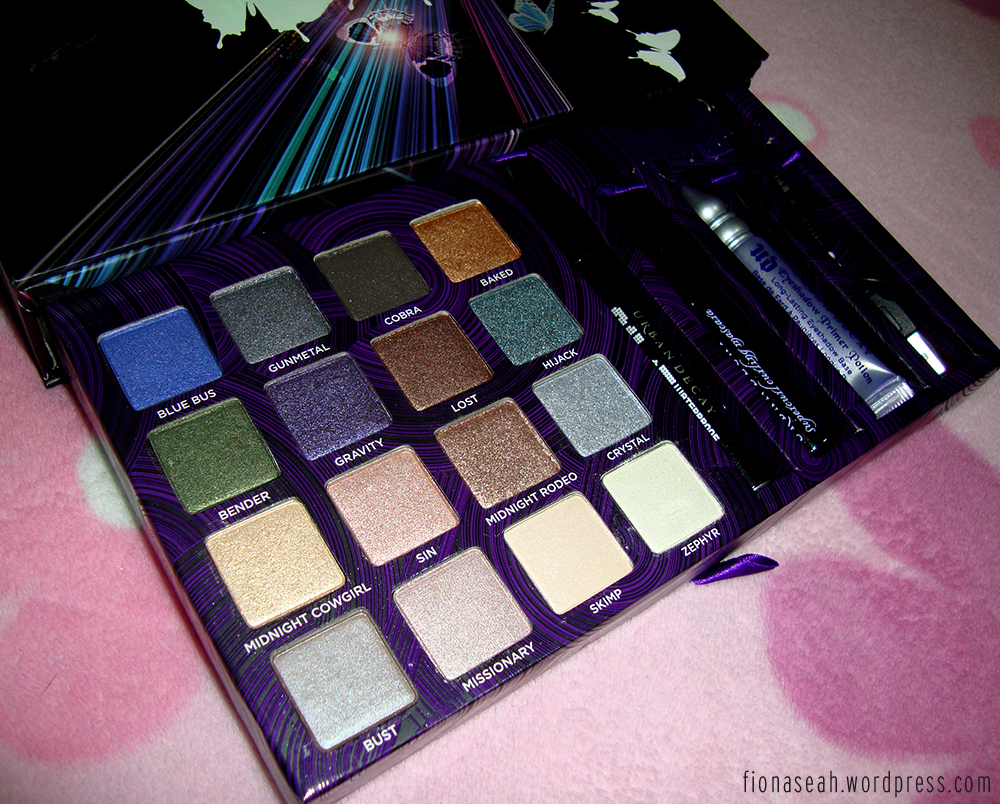
Close up of the shadows, brand new as you can see.
I LOVE IT SO MUCH. It’s like my best buy on Carousell. The colours are also very pretty and pigmented and not too loud for my liking. If only I have more than a pair of eyes to use them all everyday!
Urban Decay Ammo Palette (S$40) – RP S$63
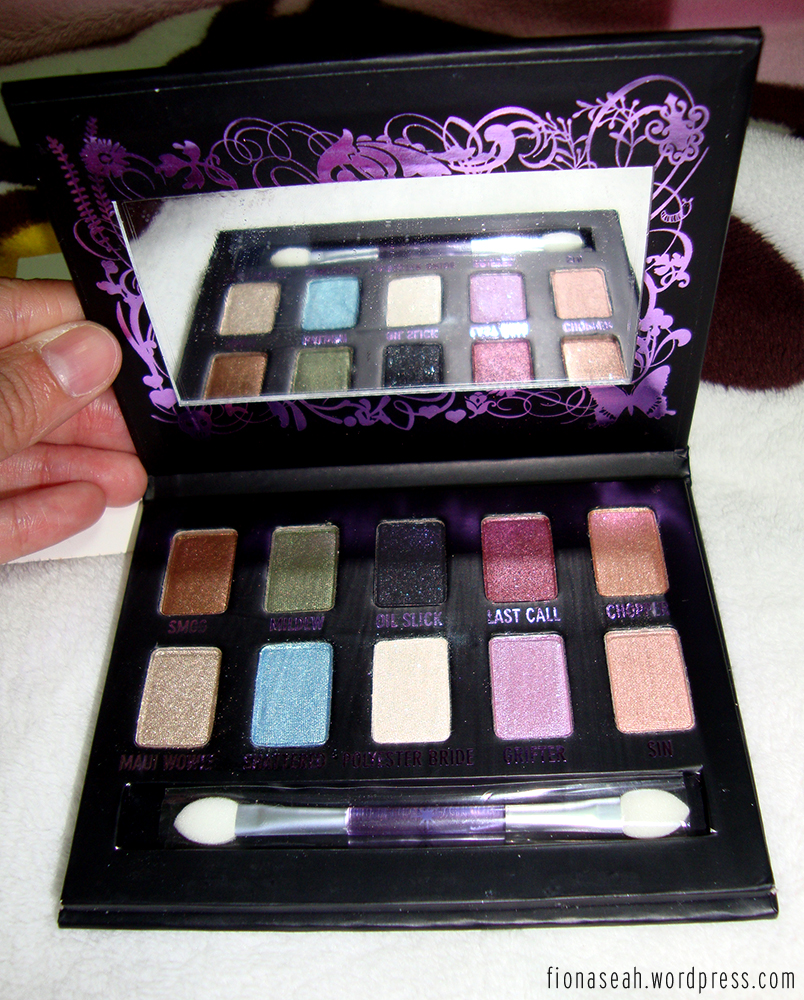
Urban Decay Ammo Palette
Not very pocket-friendly for such a small palette but you can’t deny that the packaging is really gorgeous and the shadow colours are also very feasible! This is the older version which comes with a dual-side applicator (the latest version comes with a brush instead). My go-to shades are Last Call, Mildew and Grifter. Last Call is my favourite here!!

Urban Decay Deluxe Shadow Box (S$12) – RP S$31

ALL THE PRETTY COLOURS
Another very affordable preloved (very lightly) palette which I bought just to test out the colours. Surprisingly, despite the price, the colours are very pigmented and VERY GORGEOUS. The colours look very 夸张 (exaggerated) here but trust me, they appear fine on the lids. In fact, you won’t go wrong with any Urban Decay shadows la. I’ve been using this palette almost everyday now and you’ll be surprised to see how versatile it is. As you can see, I’ve used most of Scratch and Underground already! *thumbs up* I use Honey (a very rich gold) on the inner corner of my eyes to perk them up a bit. Boyfriend commented they look like eye mucus though -_-
It came with 2 applicators but I threw them away because they kinda fell apart and I prefer using brush.
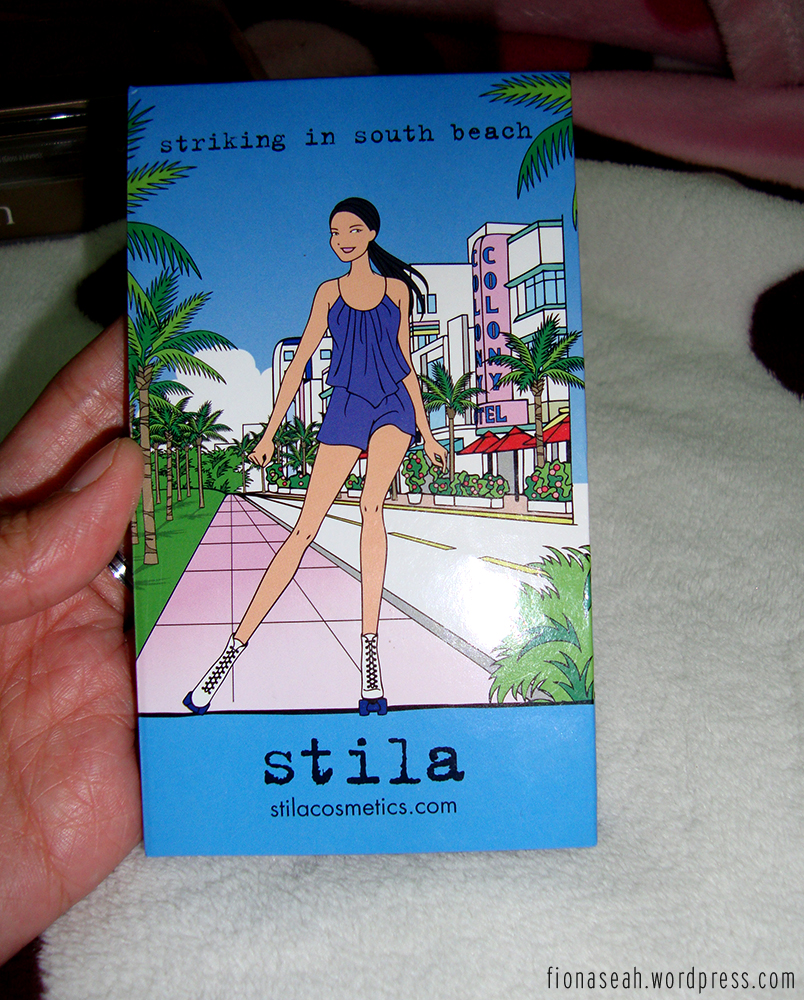
Stila Striking in South Beach palette (S$10) – RP S$29

Comes with 4 eyeshadow colours, blusher and bronzer
Not my favourite buy from Carousell but the bronzer in this is worth a mention. I brought this palette with me to Batam in July for convenience sake and only used it once so far with my own brush (I got this brand new). The bronzer has a slight sheen to it and can also act as a highlighter. Its right amount of “darkness” (am I making any sense) helps to define my face effortlessly. The bronzer is so stunningly addictive that I almost overdid my face. HAHA
For newbies who are afraid of using bold colours, fret not. It comes with a mini tutorial below the mirror! Not very illustrative but it helps somehow. However I don’t really like this palette because it has too much blue :S So anyone who is interested to get this from me, please drop me comment!

Urban Decay Naked 1 and 2 palettes, both at S$65 each. They retail at S$80 in local Sephora stores
2 of Urban Decay most popular palettes, it needs no further introduction! The price isn’t something to wow about because brand new pieces range from $60-70 on Carousell. Anything lower than that are usually counterfeits.
I’ve used Naked 2 for a longer time because I got it earlier than Naked 1. I’m hitting pan soon! So proud of myself. Hahaha. However I have to say that Naked 1 has nicer shades 🙂
Psst, boyfriend got me Naked 3 too! I actually love it more than Naked 1 and 2 :O Will do a review if I have time.
Enough of eye make-up! Now let’s move on to the face!
(Yes I’m not done yet. My shopping must maintain)

The Body Shop travel brush set (S$12) – RP £13.50

Awww the brushes are so adorbs!
I applied my Stila make-up with these cute lil thang in Batam. I’ve used all of them except for the angled brush. The bristles are really soft and they don’t irritate my sensitive skin. Since they are travel-sized, they can be too small to use (if you get what I mean). Like you need twice the time needed to doll yourself up because the surface area of the brush is 2 times smaller than a regular-sized one lol.
Sleek Blush by 3 in Pink Sprint (S$15) – RP US$15.99 online

Sleek Blush by 3 in Pink Sprint
My first Sleek make-up! As it is very pigmented, I dare not apply too much on my cheeks in fear of looking like a Chinese opera singer but if you use it moderately, it should appear very nicely on your cheeks. I’d blend 2 shades on mine if I use this blush.

Tarte Amazonian Clay Blush in Blissful (S$15) – RP S$42

Close up of the blush
I use this blush on a daily basis because I absolutely love the shade on my cheeks. It gives me a natural flushed face with just one swipe! I got this before Tarte came to Singapore and I’m so shocked to find how expensive it is in Sephora now that it’s here! Even though I really love this product, I doubt I will get it from the store because I don’t think its small size is worth the hefty price.

Benefit Sugarbomb Blush (S$18) – RP US$28, close to S$40 in Sephora if I am not wrong

Comes with a mini blush brush
Benefit has many kinds of boxed blush and Sugarbomb is one that gives a very natural and subtle flush on your face. It think it would work better on people with fair skin because it doesn’t really show up on my cheeks (it still does a little but not the look I’m trying to achieve) T_T Plus, I’m getting tanner from all the morning jogs so I guess that’s masking the blush even more.
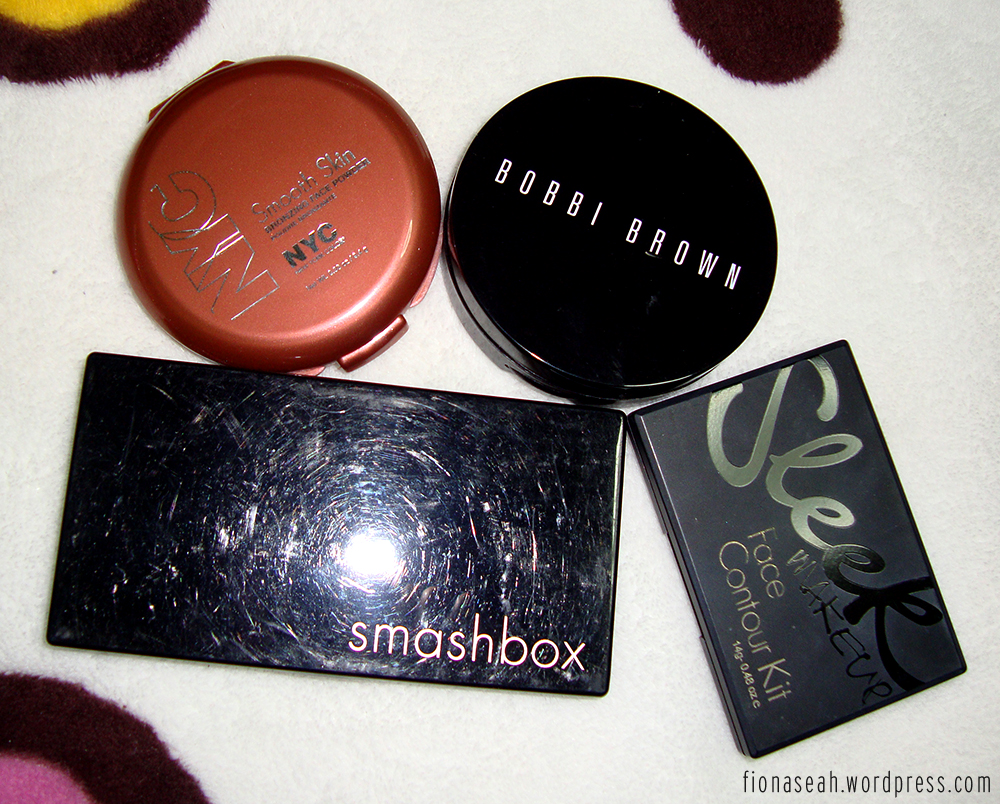
Sneak peak of the bronzers which I will be showing you guys!
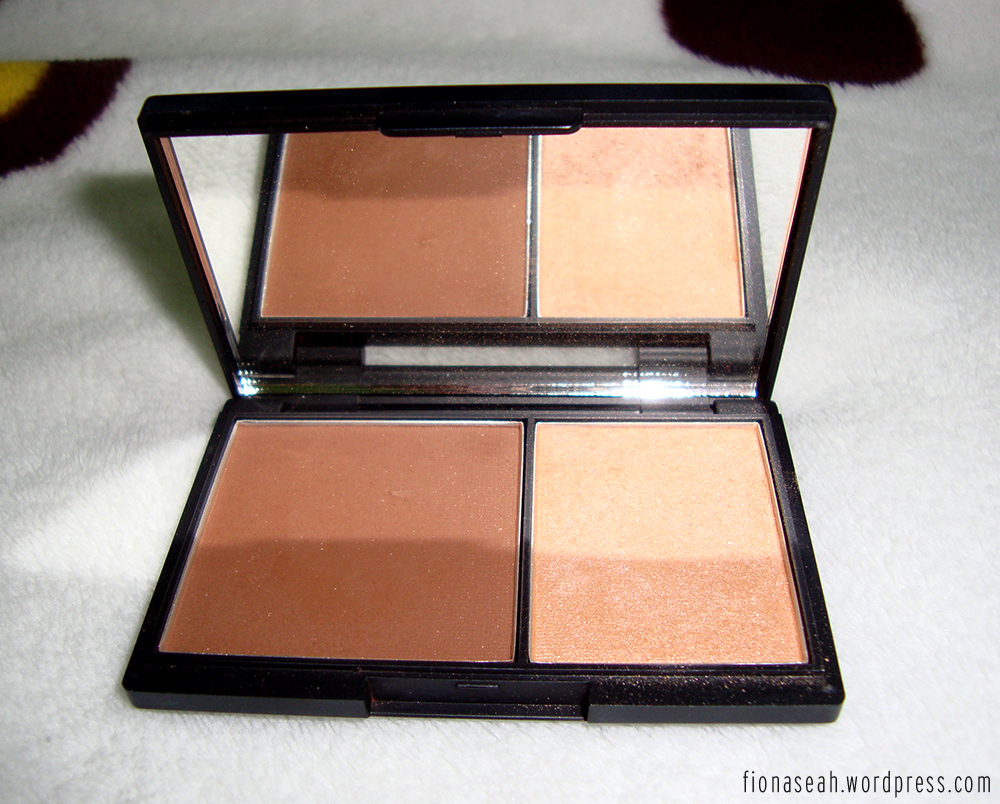
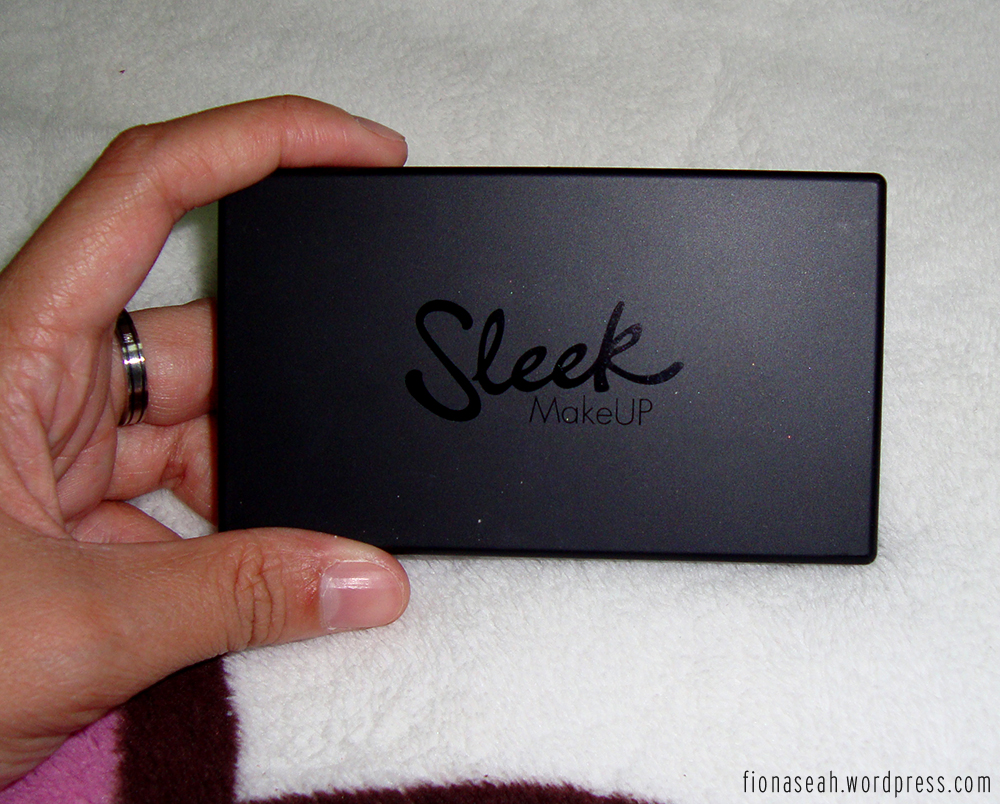
Sleek Face Contour Kit (S$10) – RP US$8.50 online without shipping
I bought this for its highlighter because I was searching high and low for one. It comes with a bronzer as well which I hardly use. The bronzer is not bad though but I find it too dark on my skin tone (maybe I applied too much, can’t remember). However it’s very compact hence very convenient to be brought around. I use this to contour my nose.

Smashbox Step-by-Step Contour Kit (S$25) – RP US$44.95 on Amazon
My favourite contour kit because the step-by-step instructions really helped me a lot when I was still new in contouring my face LOL. Plus I can really see the difference on my face and my features enhanced. I only use this on special occasions because I don’t want to appear to have too heavy a make-up on normal days.

Bobbi Brown Bronzing Powder (S$30) – RP US$38 on Bobbibrowncosmetics.com
Bobbi Brown has one of the best bronzers rated by beauty sites and I have to agree! The one I have doesn’t appear very harsh on my face and it blends (doesn’t appear too blotchy) onto my skin tone while still giving that slimming effect.

NYC Smooth Skin Bronzing Face Powder (S$10) – RP US$2.79
It wasn’t a good deal since I got it for more than its retail price. However since it’s only available in the US, I shall pretend that I paid for shipping and handling too LOL. The packaging is a little outdated I must say.. It’s made of not-very-classy-looking plastic and it comes with this cheap looking powder puff O_O Like who uses that nowadays?! Anyway, I’ve never heard of this brand so I did a search on Google. It turns out that this bronzing powder is also highly raved by beauty bloggers. It is also rated very highly on makeupalley.com. Ditto. I really love this bronzer and I’ve been using this everyday as well since I received it! It’s almost gone now though 😀 If only they could improve on the packaging. 😛

Topshop Desert Sun Blush/Bronzer Duo (S$6) – RP £12.50
I didn’t know Topshop carries cosmetics! But I feel that they should stick to selling apparels because their make-up don’t work.. for me at least. 😦 I appreciate shades which are less pigmented but this doesn’t show up on my face at all. I was so disappointed 😦 And I always felt that there was something missing on the packaging. There should be a mirror on the hollow space of the inside cover right?!
Sneak peak of the concealers!

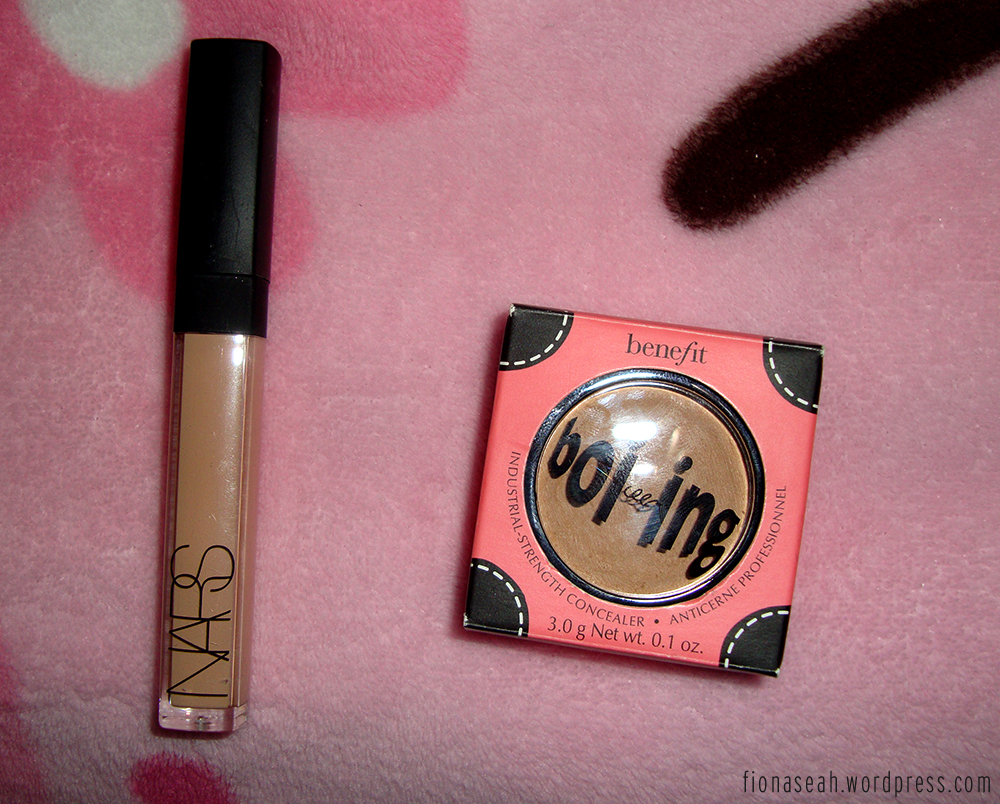
NARS Concealer in Honey (S$20) – RP S$40+
This is a liquid concealer which comes with a q-tip-like thing which makes it easier to apply on the face. I use this when I’m in a hurry. My first NARS product and I am very satisfied! But it’s a little too pricey 😦
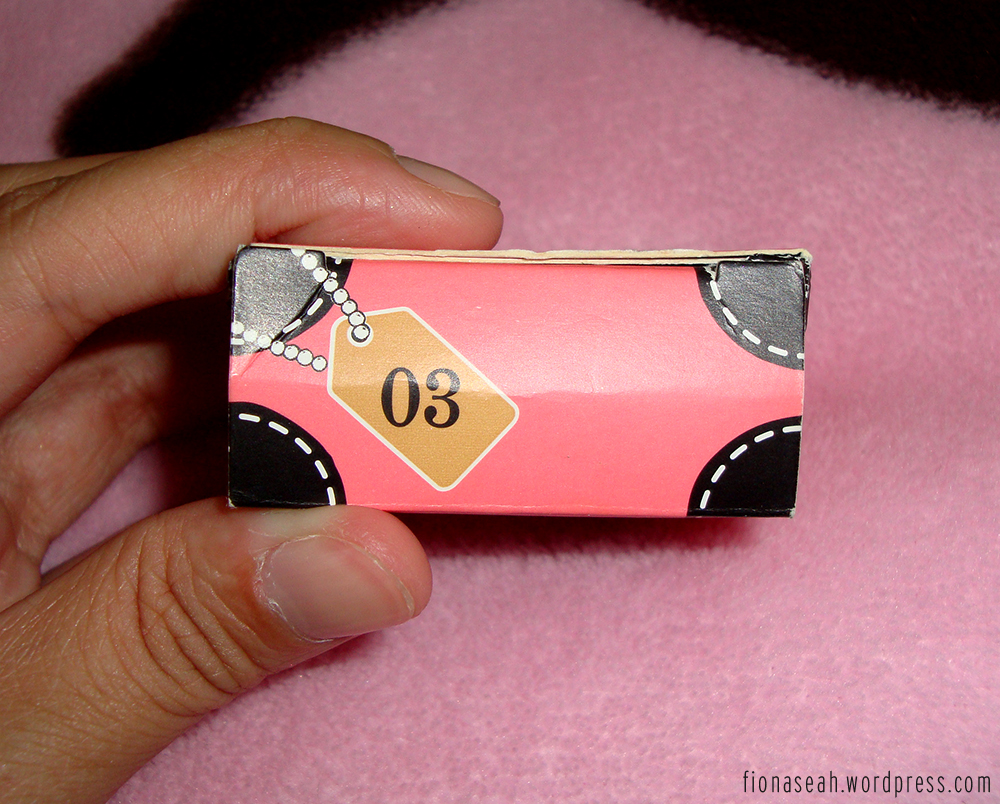
Benefit Boi-ing Concealer in Shade 03 Medium (S$18) – RP S$34
BEST CONCEALER. Hands down. Benefit really isn’t joking whey they claim that it’s industrial strength. It does cover any hideous discolouration or blemishes! I love this so damn much also because it’s the closest to my skin tone and I think it’s better than the NARS one above in terms of coverage. The price is reasonable too for a high-end concealer! I will definitely get one from Sephora once I empty this tub (already hitting pan too).

Benefit POREfessional (S$38) – RP S$48
One of my staple make-up and I’d feel super weird if I don’t use this before putting on foundation. It covers the pores on my face (I apply on my T-zone) and gives my skin a very smooth finish as a result. My mom loves it too!
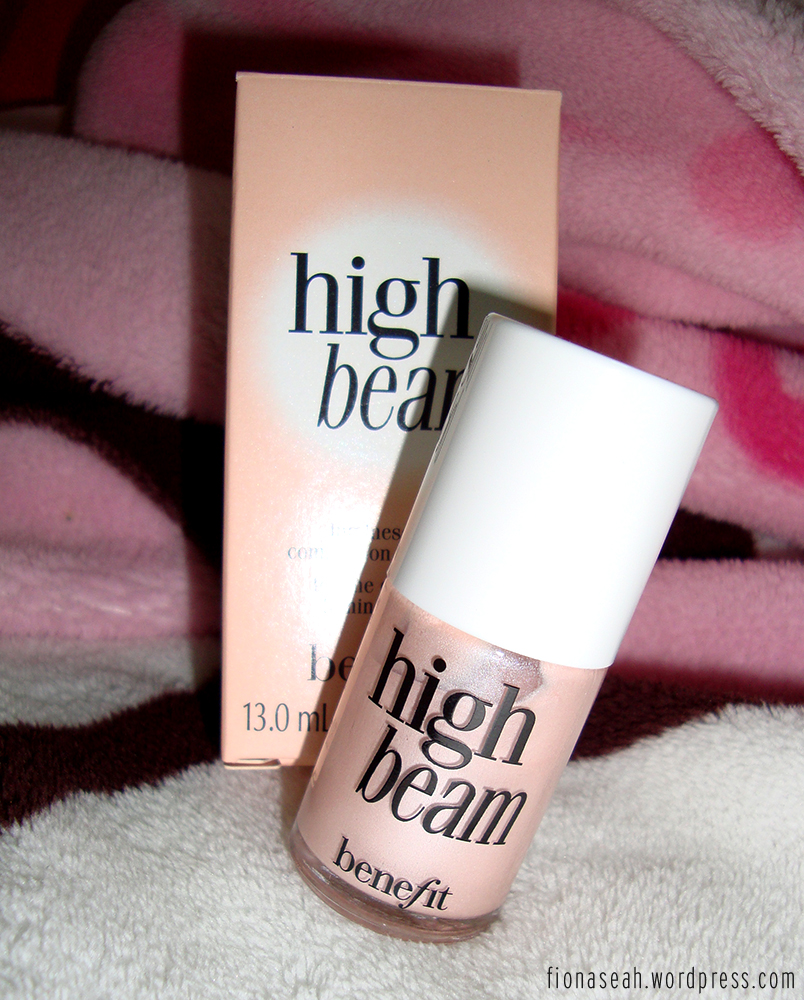
Benefit High Beam (S$18) – RP S$42
Another best buy from Carousell! High Beam is a highlighter which works better than the Sleek one above. It’s pretty strong though so just one short swipe on the nose bridge, cheek and brow bones is enough to give that brightening/slimming effect without overdoing it.

Foundation and primer: Sample-sized HELLO FLAWLESS Oxygen WOW in Honey and Champagne (S$9 each) / sample-sized Some-kind-a-gorgeous foundation in Medium (S$9) / sample-sized dr. feel Good face primer (S$4). Since all are sample sizes, I don’t have the retail prices.
I’m obsessed with the HELLO FLAWLESS (I’m just gonna stop here because it’s really a mouthful oh gosh. Why, Benefit?) foundation because it really gives me a flawless complexion. I used to think Champagne suits my skin tone but since I’ve become slightly tanner, Honey seems to work best for me now. They come in pump bottles to reduce wastage (yay!), so I usually pump twice on the back of my hand and dap it using my foundation brush all over my face!
Some-kind-a-gorgeous is a foundation faker which job is to even out skin tone, especially if you have blemishes. Actually I don’t see any difference between this and the HELLO FLAWLESS one though.
dr. feel Good is a complexion balm which helps to mattify shine. Works wonders on oily skin like mine. According to Benefit, it can be worn alone, below or on top of make-up. Being ever sceptical and cautious, I only wear it below make-up because I’m afraid it’d ruin my face if I wear it above. LOL. And yes it does help to control shine for up to 8 hours for me!
Once I’m done with the sample sizes, I will probably get the full-sized ones from Sephora 🙂
Some lippies to share:

MAC Lipstick in Quiet, Please (S$9) – RP US$18.50
I echo the reviews on makeupalley. It does have a very nice colour (which was why I bought it) but it is too sheer and has too much shimmers! So much so that the colour doesn’t really appear at all. 😦
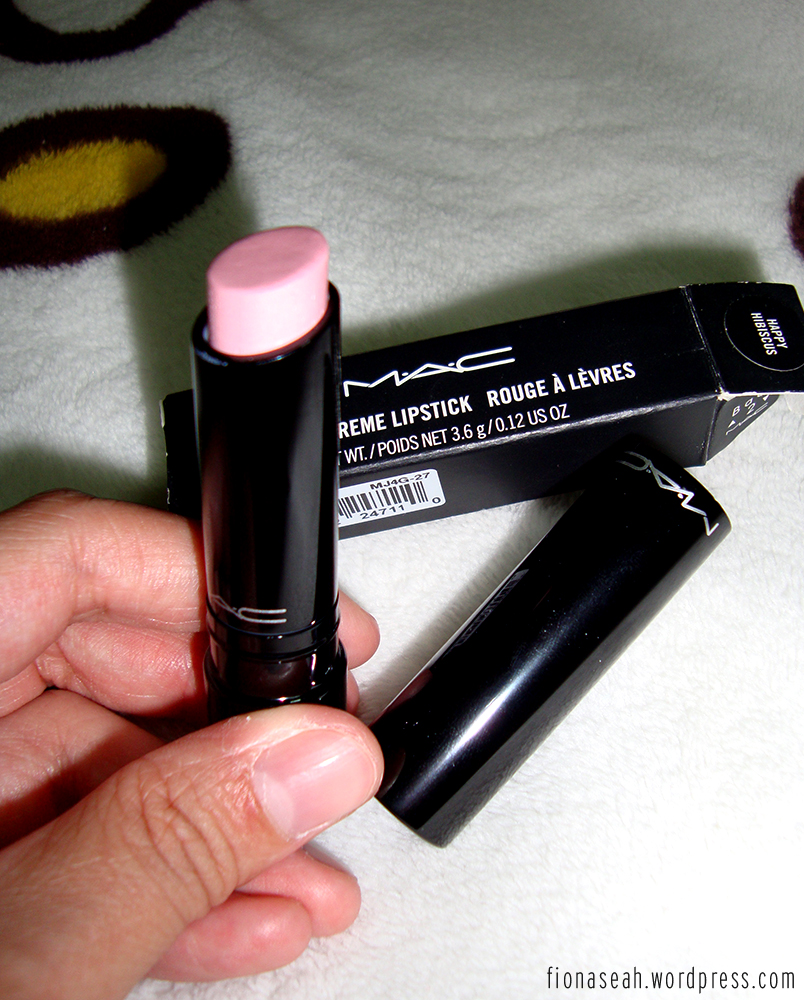
MAC Sheen Supreme Lipstick in Happy Hibiscus (S$9) – RP US$14.99
This is in a very pale baby pink shade and is really hard to pull off. It looks very nice on Google images though. I think it’s very suitable for people with fair skin once again. I blend this with a deep red lippy to give a more pinkish lip colour.
Alright everyone, THESE are my Carousell purchases!! And that’s not all! I’m merely featuring those that are worth mentioning. HAHA I am so horrible! But these were purchased over a period of 5 months la so not too bad. 😛
I’m finally done writing this 3000-over-word entry!
Have a Merry Christmas everyone!!